

Mailtrackio Documentation
Follow the complete Mailtrackio guide to create your account, verify your email, install the Chrome extension, review your dashboard, understand reports, create polls, and manage fill-and-sign requests.
Sign Up Process
Create and activate your Mailtrackio account.
To create an account on Mailtrackio, follow these simple steps:
Visit the Registration Page
Choose Your Preferred Sign-Up Method
We offer two convenient ways to register:
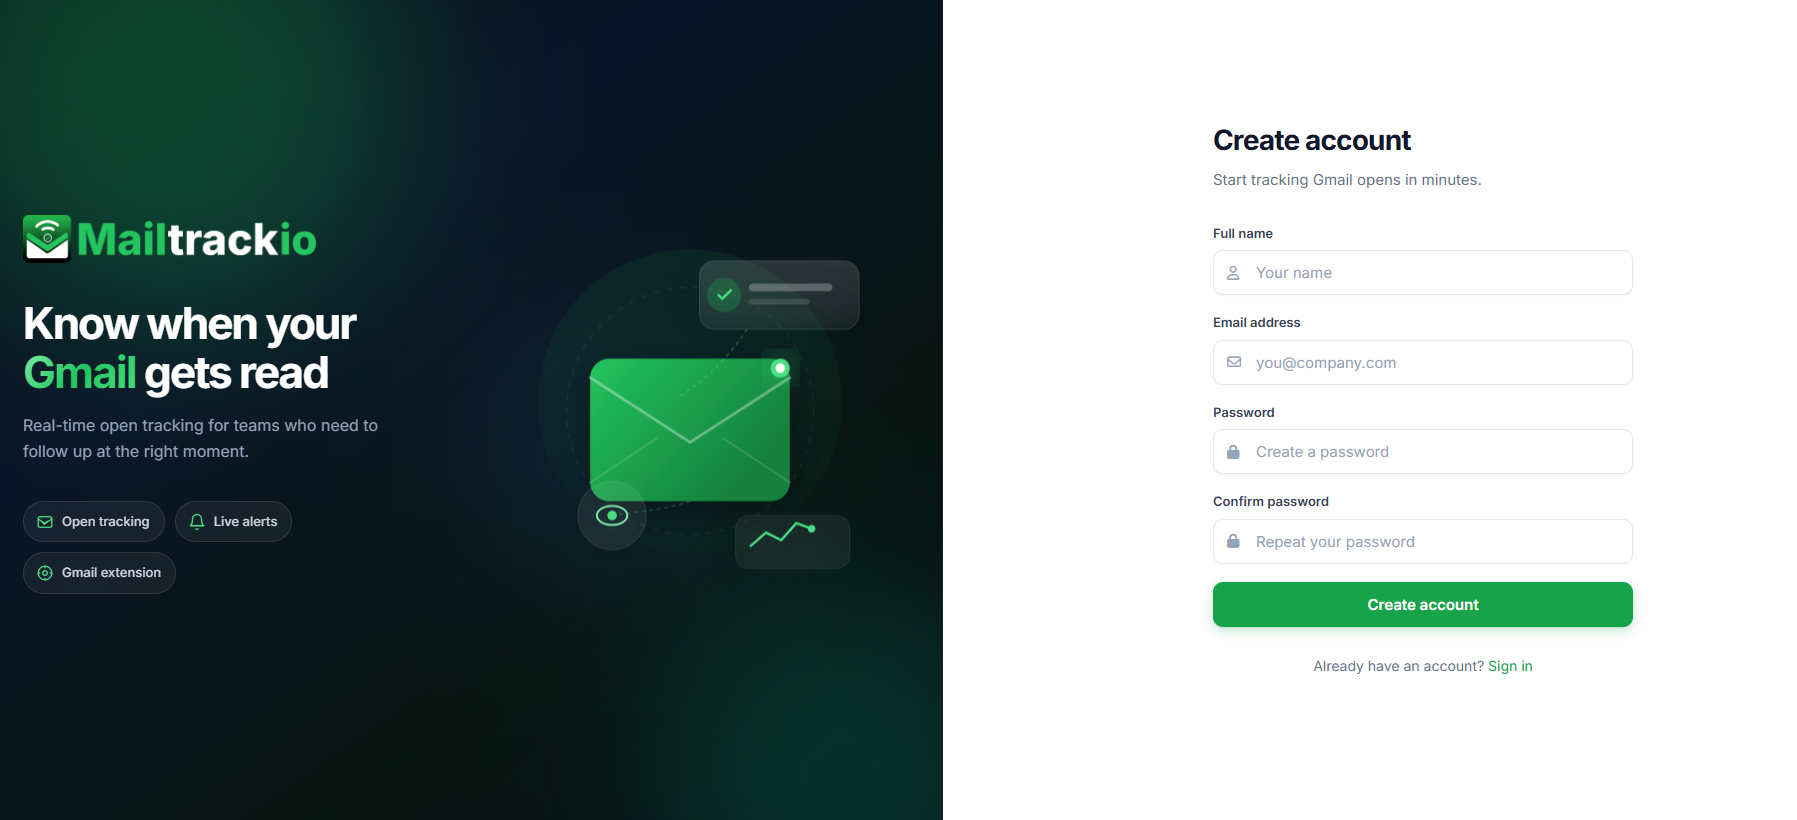
Enter Your Details
- Full Name – Used for your account profile.
- Email Address – This will be your login ID.
- Password – Enter any password you want to use for your Mailtrack.io account.
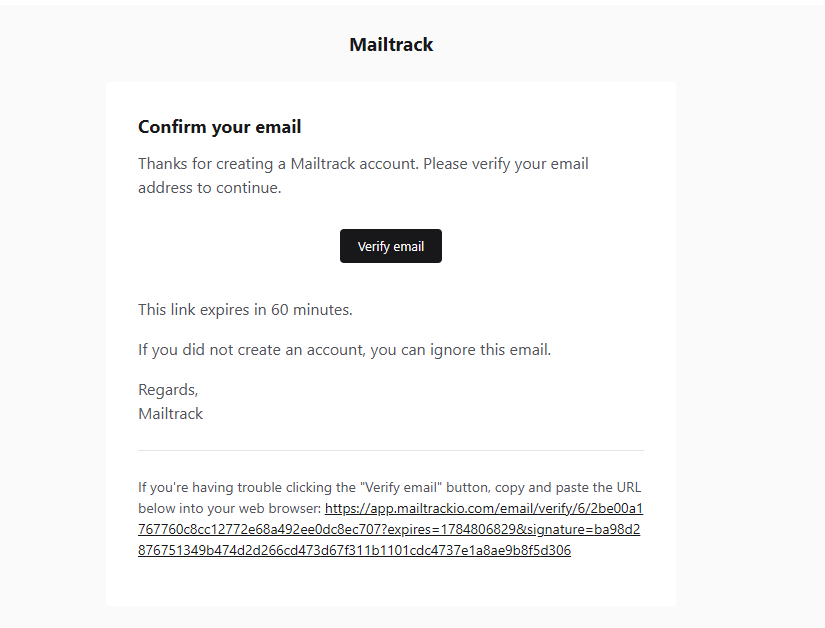
Verify Your Email
After signing up, an automatic verification email will be sent to the address you provided.
Check your inbox — look for an email from Mailtrackio.
Open the email and click the Verify Email Address button.
Once verified, your account will be fully activated and ready to use.
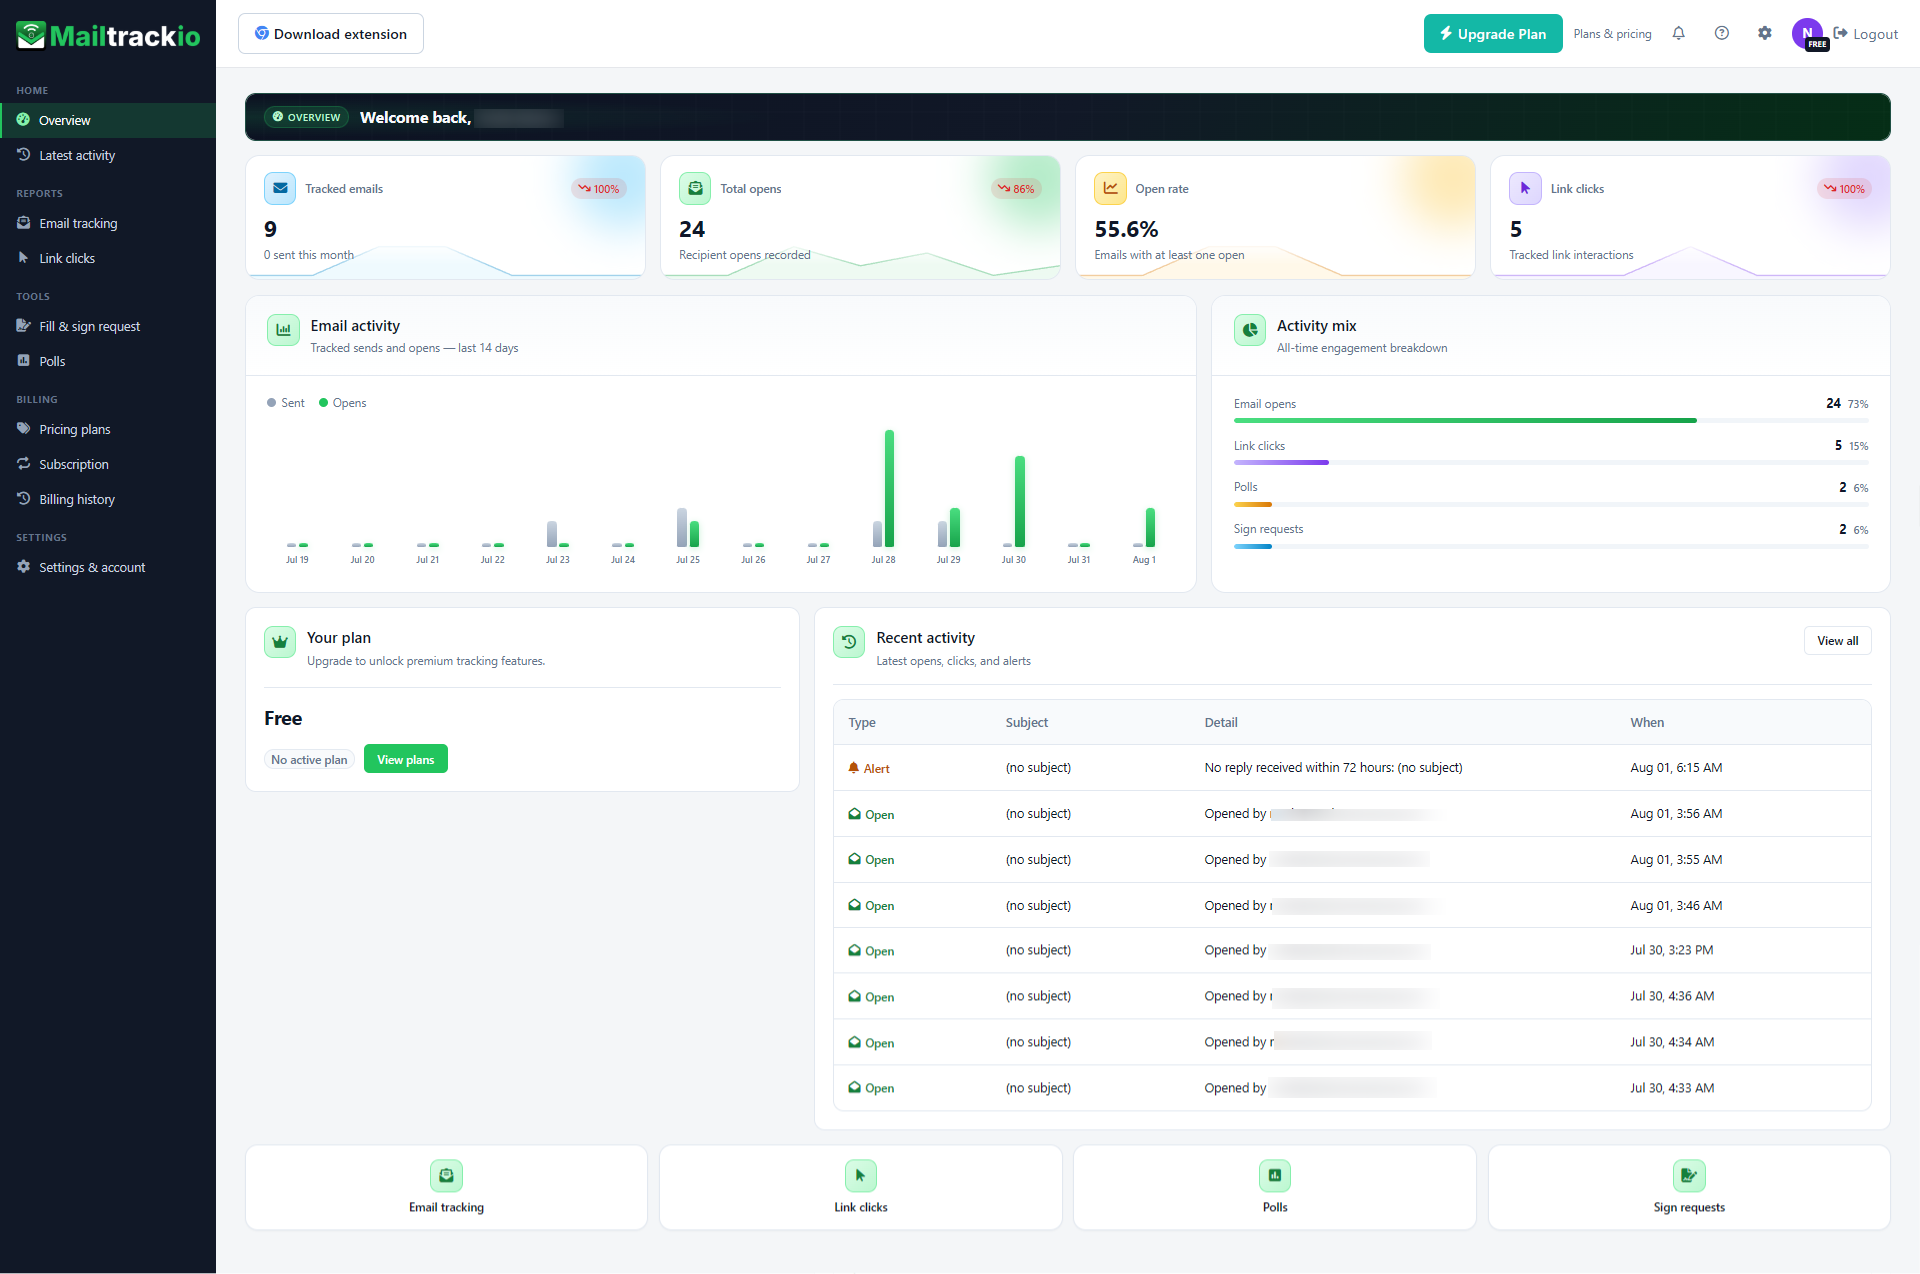
Getting Started: Your Dashboard (Home)
Understand the main areas of your Mailtrackio workspace.
When you log in, the Home tab is your workspace overview. Here you'll find:
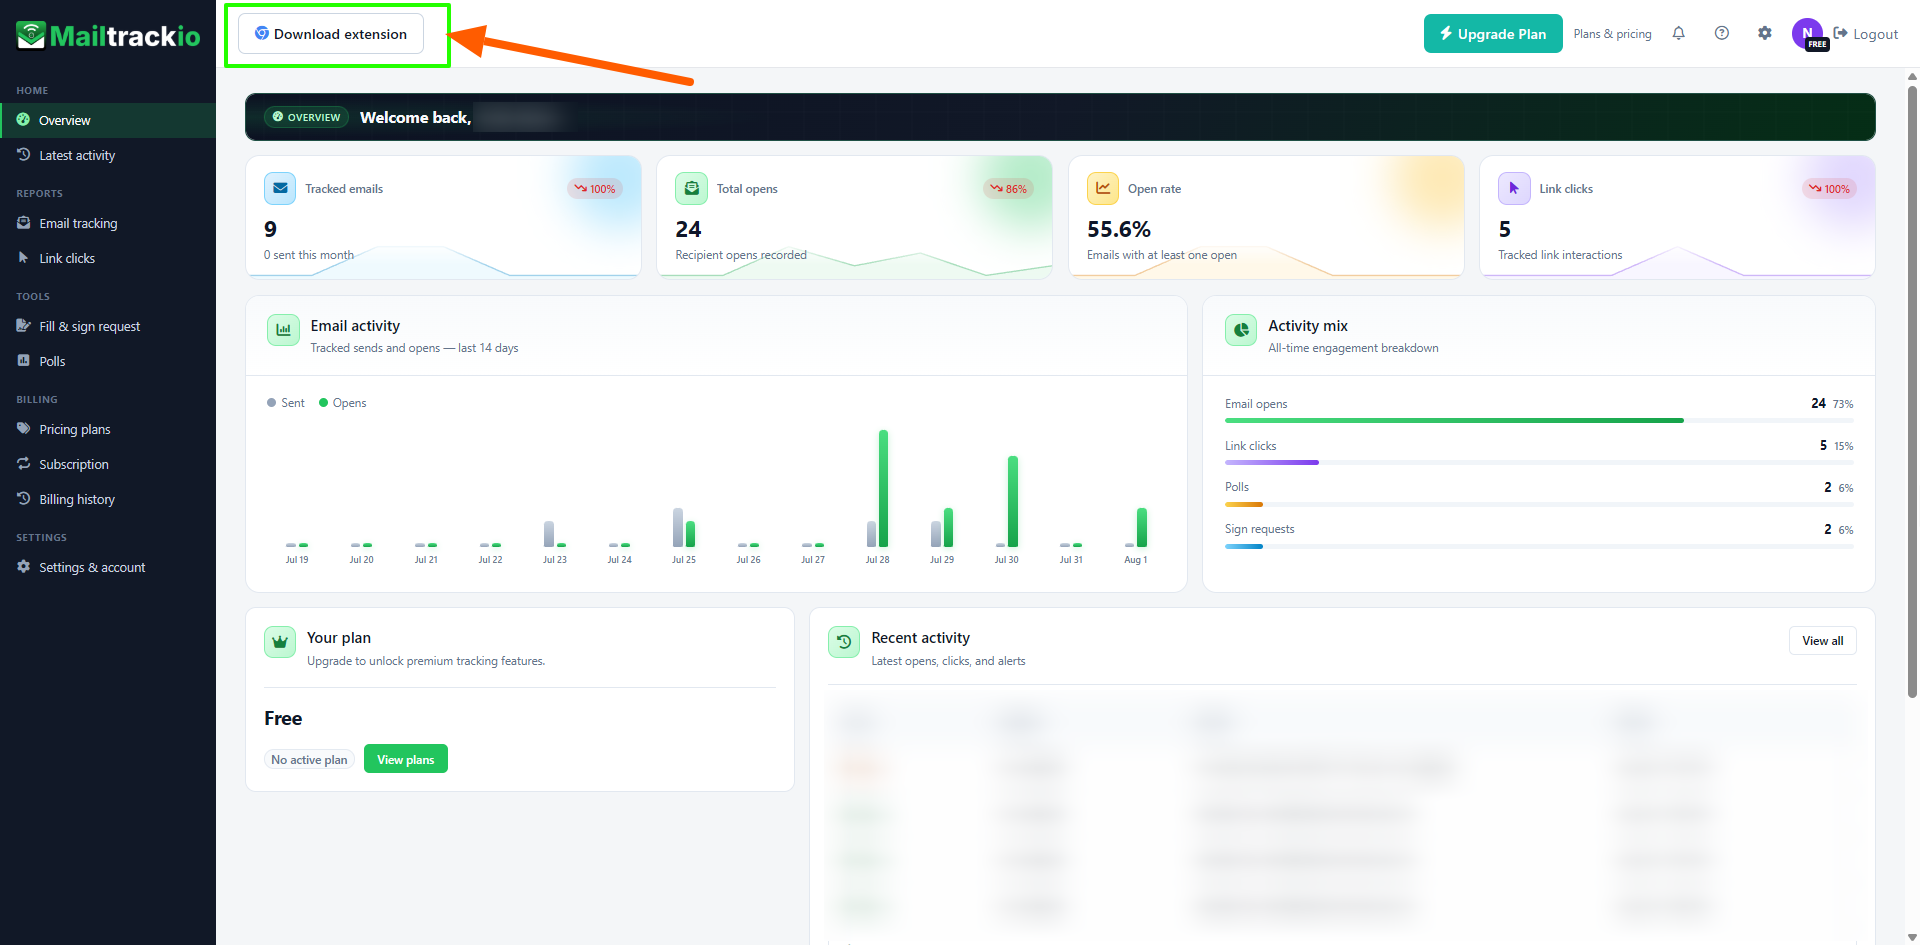
Download the Chrome Extensions
Install and connect the Mailtrackio extension with Gmail.
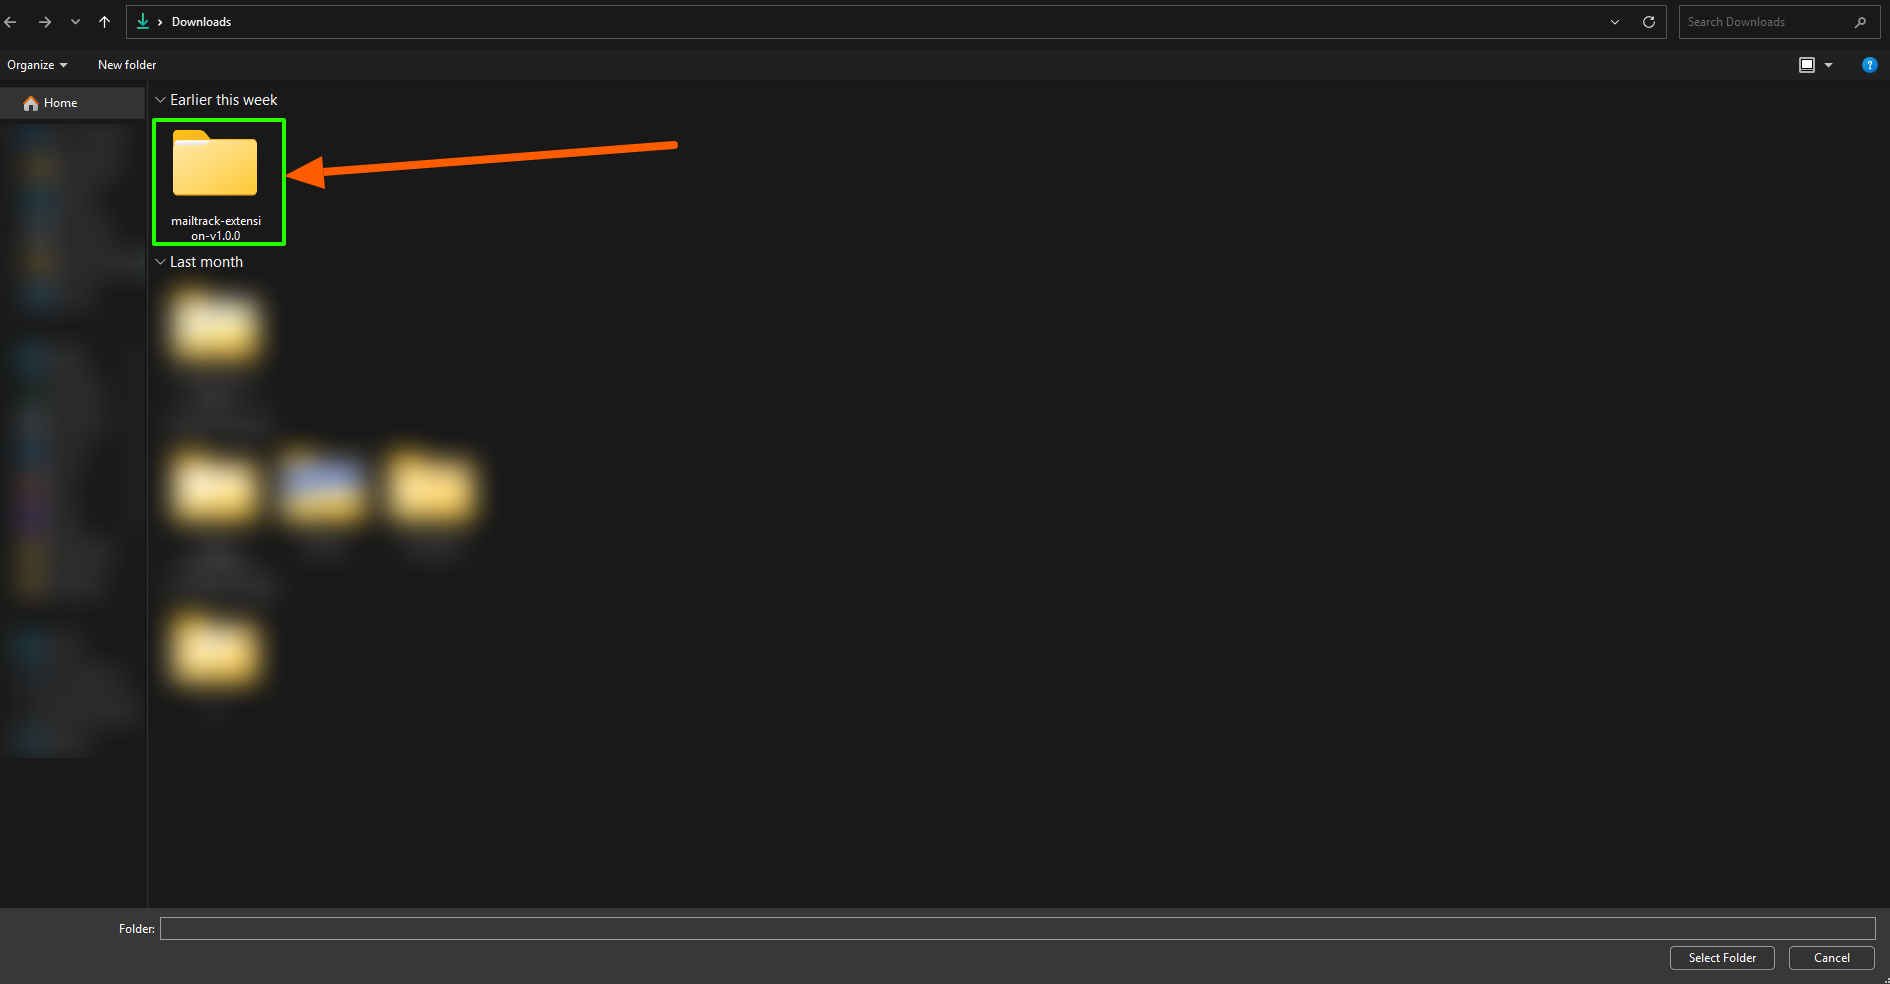
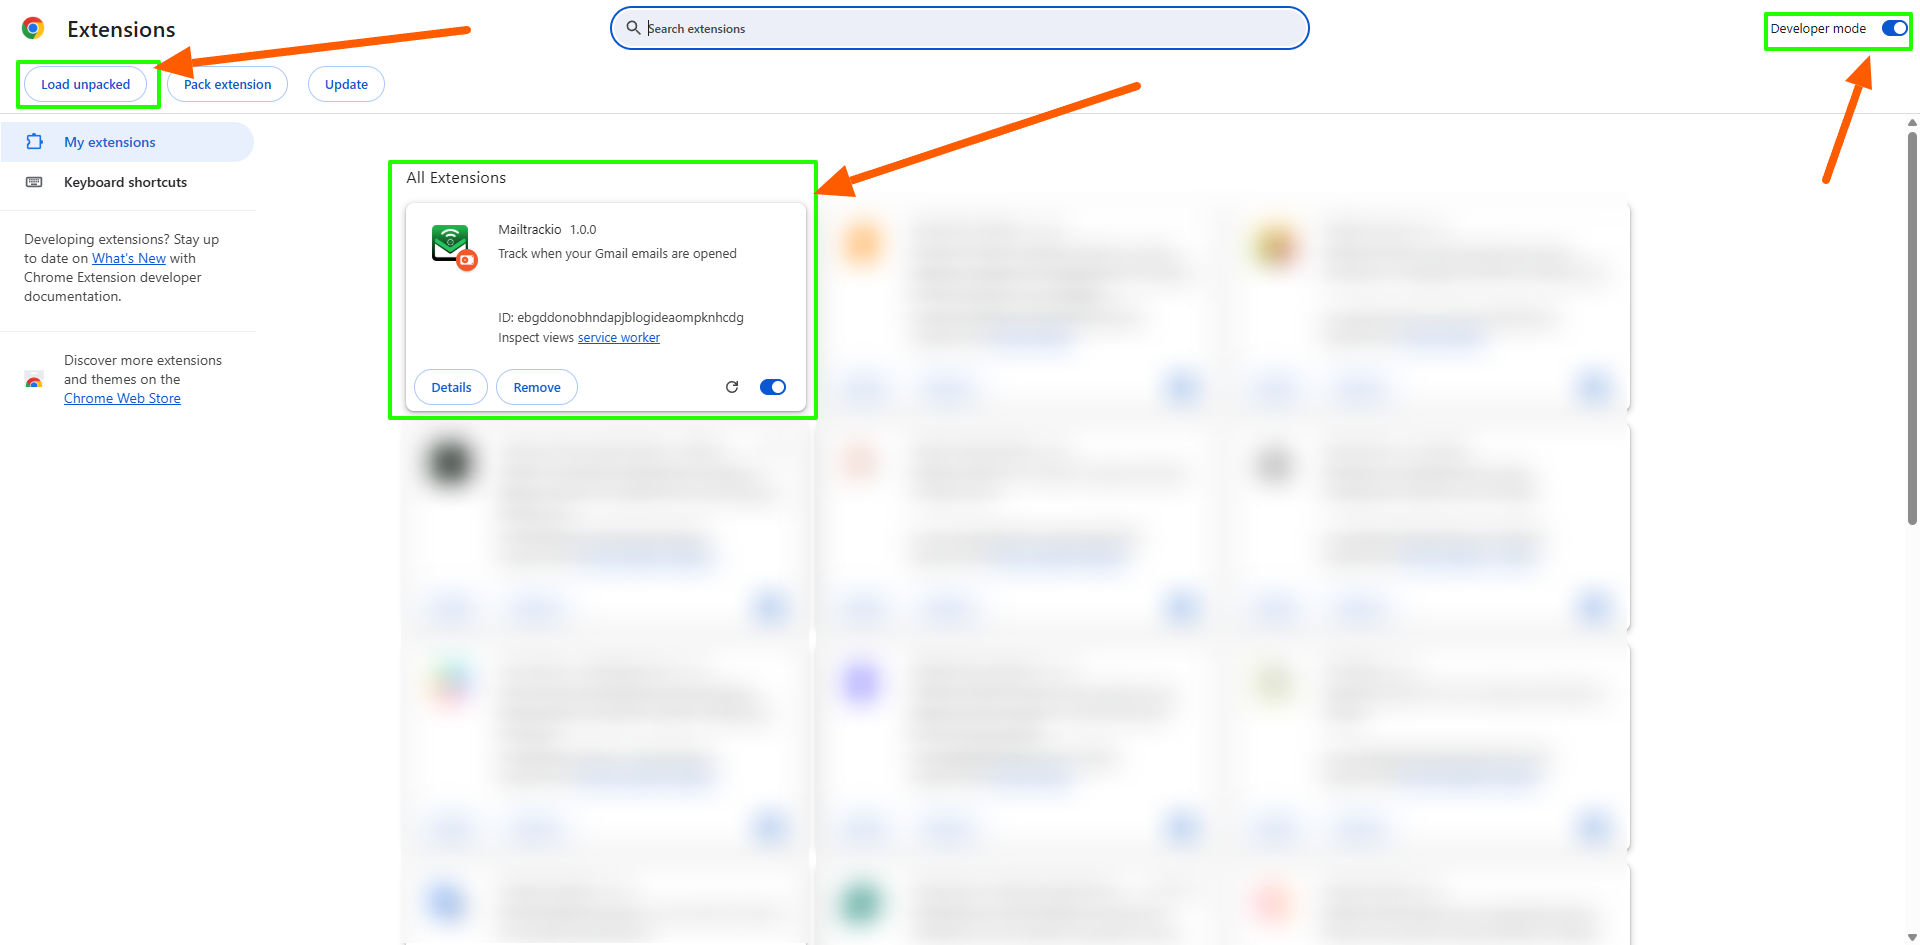
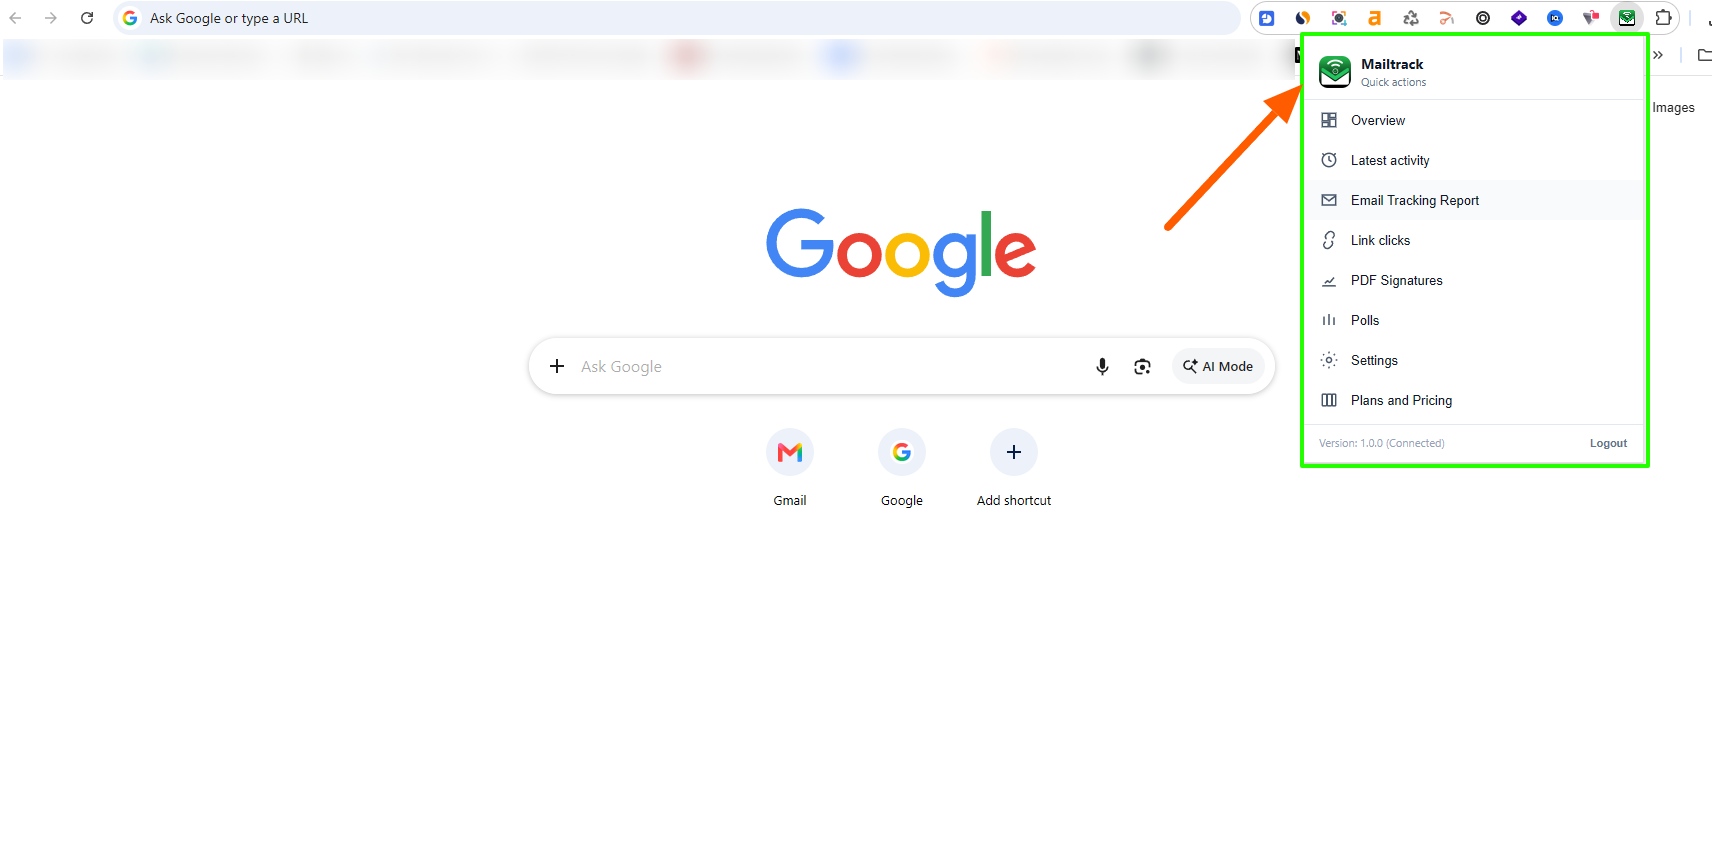
Upload it to the browser's extension management section. Then make sure that, in development mode, then upload the unzipped folder to the browser extensions panel:
- Download the plugin from the dashboard.
- Unzip the folder.
- Upload it to the browser developer mode extensions sections.
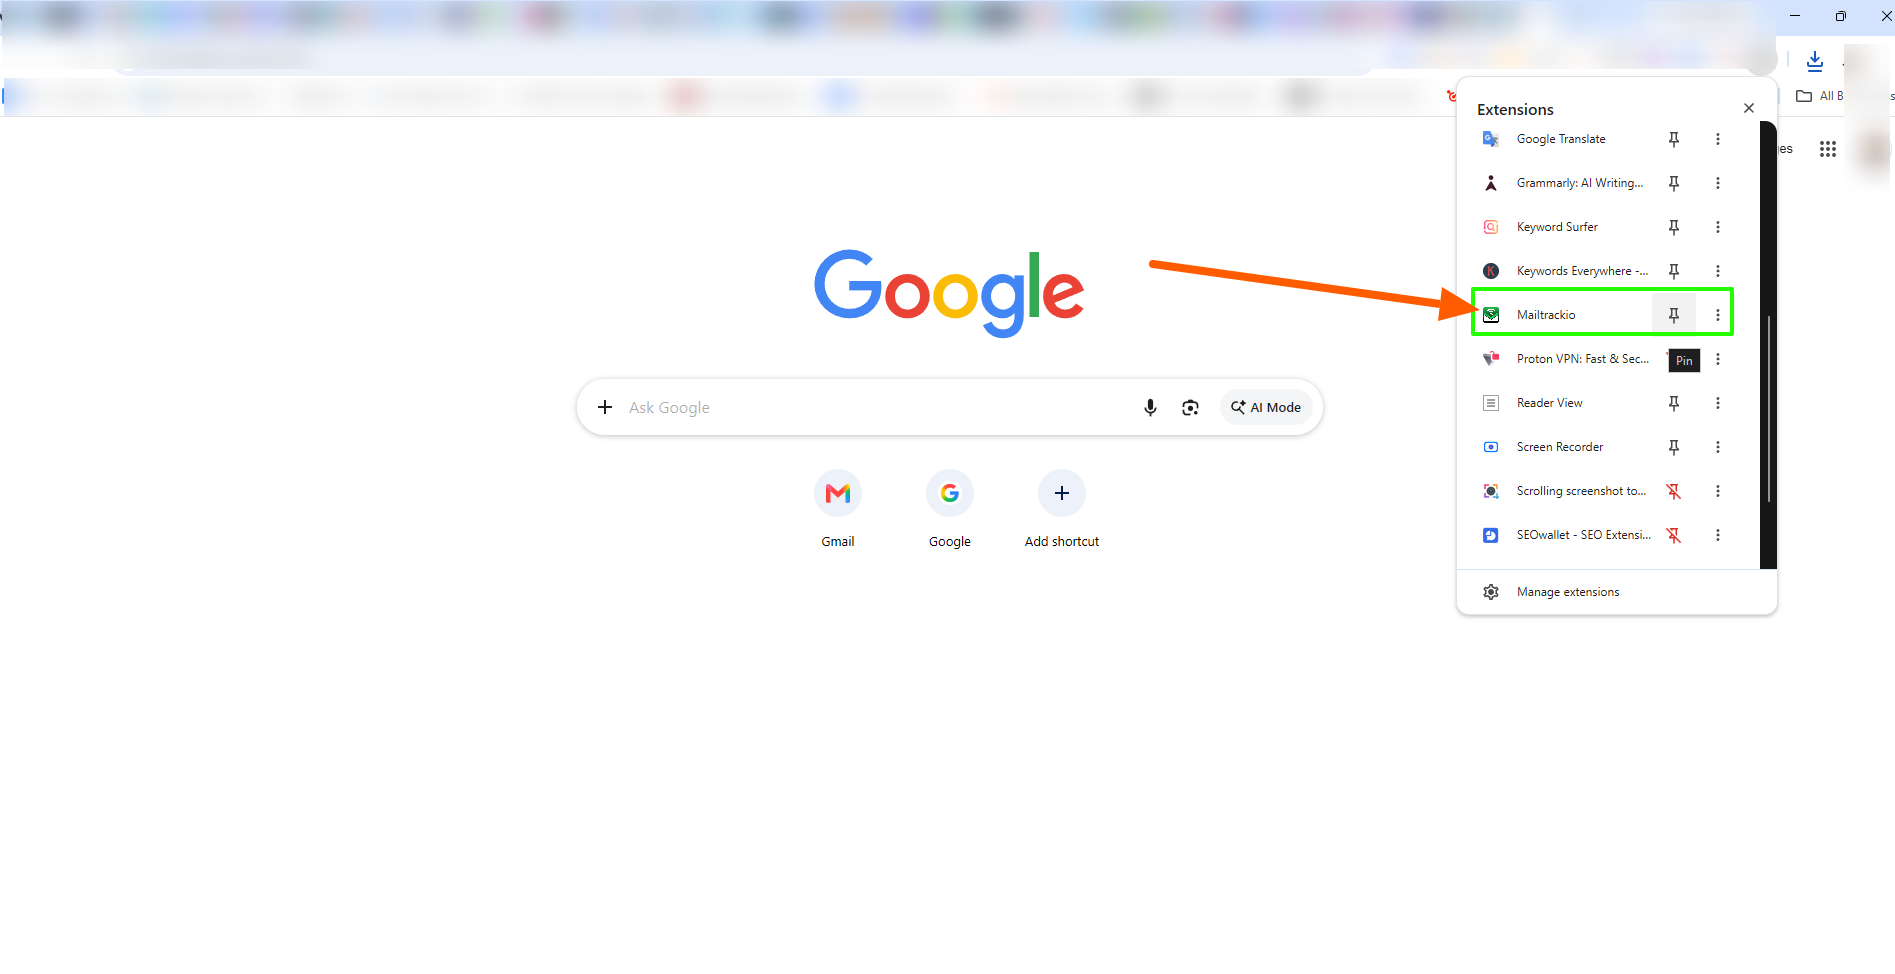
- Pin it to the browser extension bar.
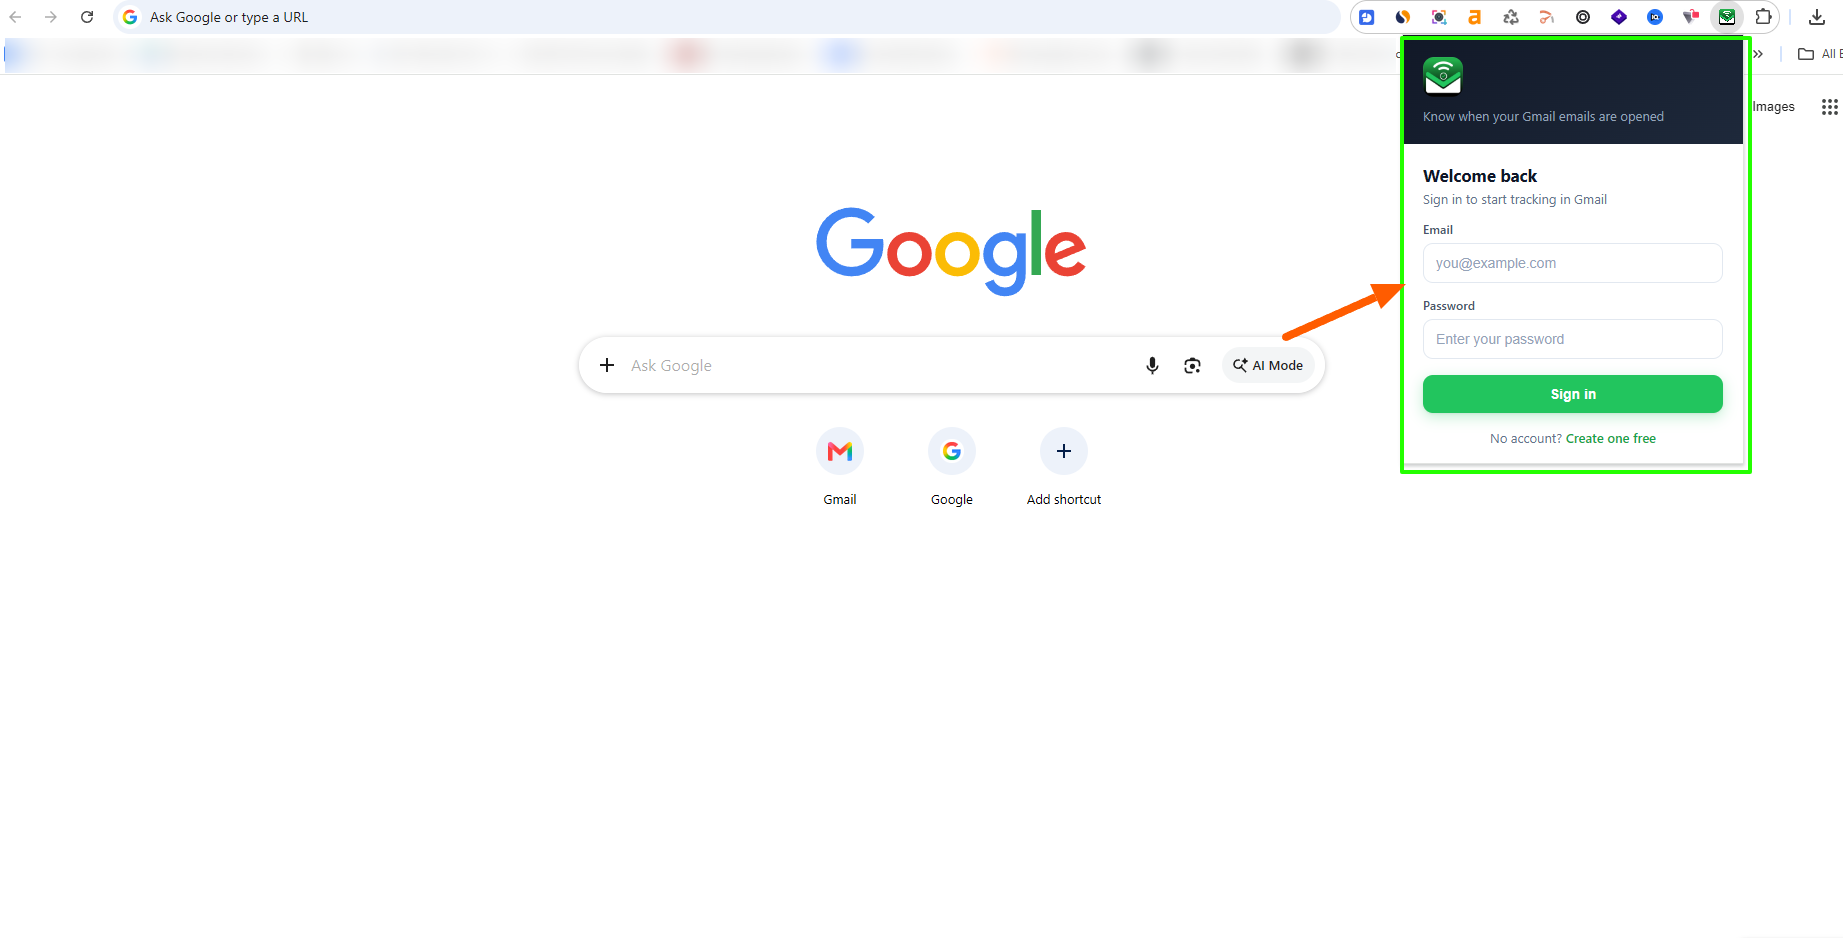
- Now log in to that section to use it.
Reports
Review detailed email tracking and link-click information.
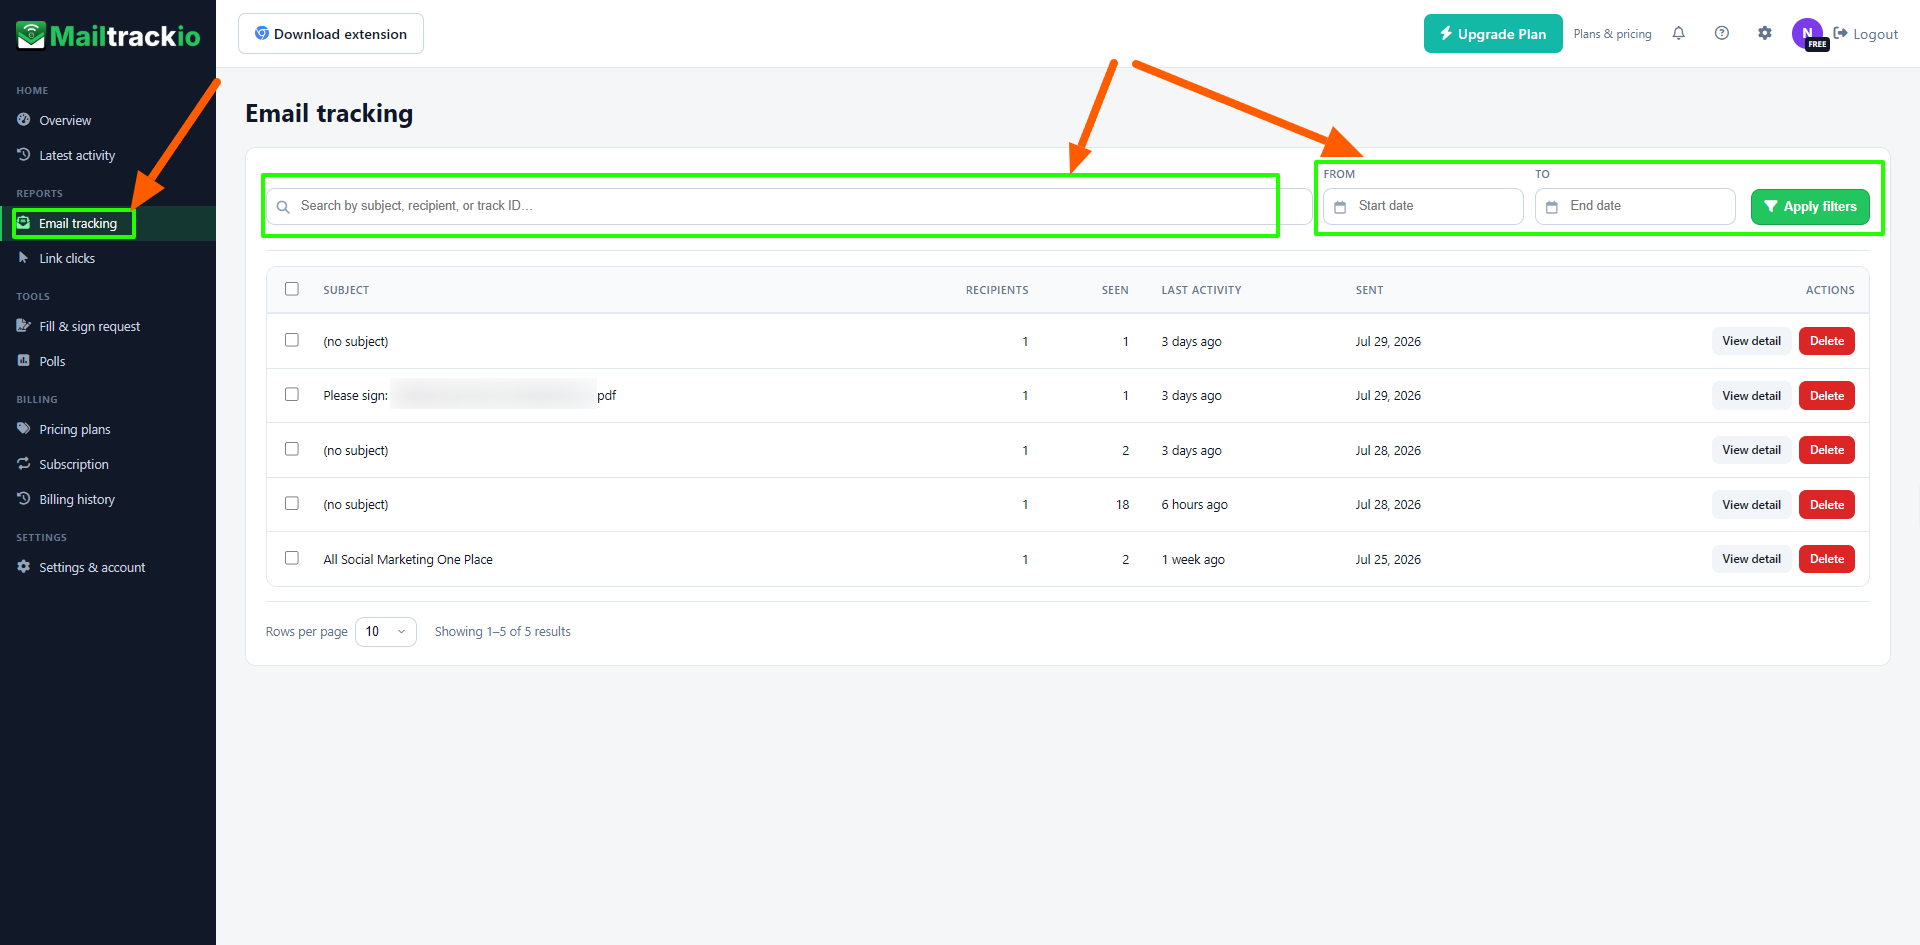
The Reports tab — Users can see details of the email tracking and link click section.
Step 1: Choose Email Tracking
At the top of Email Tracking, select what you want to see in the Details in Action section:
- Apply filters — summary of the total email list.
- Email Summary — Total email activity summary.
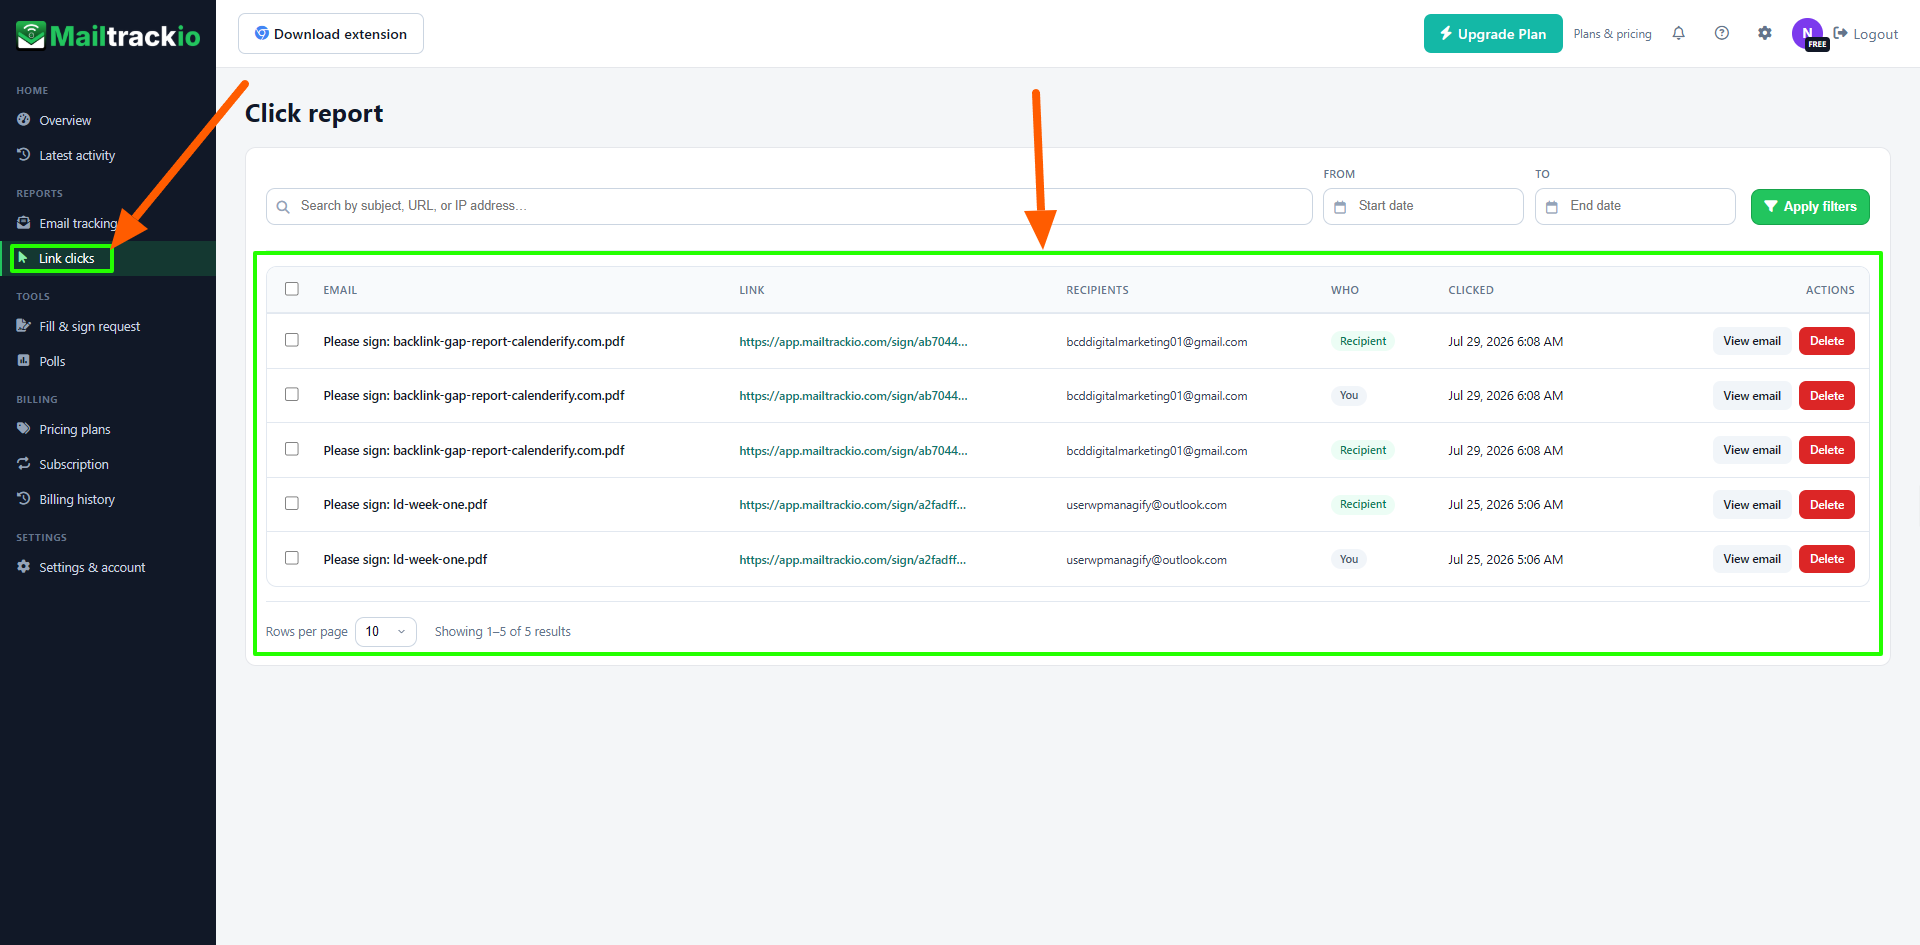
Step 2: Link Click
Once you select Link Clicked as your email campaign, or sign the PDF through email campaign:
- 5 PDF — 5 email signature requests for the free plan.
Tools
Create fill-and-sign requests and polls from Gmail.
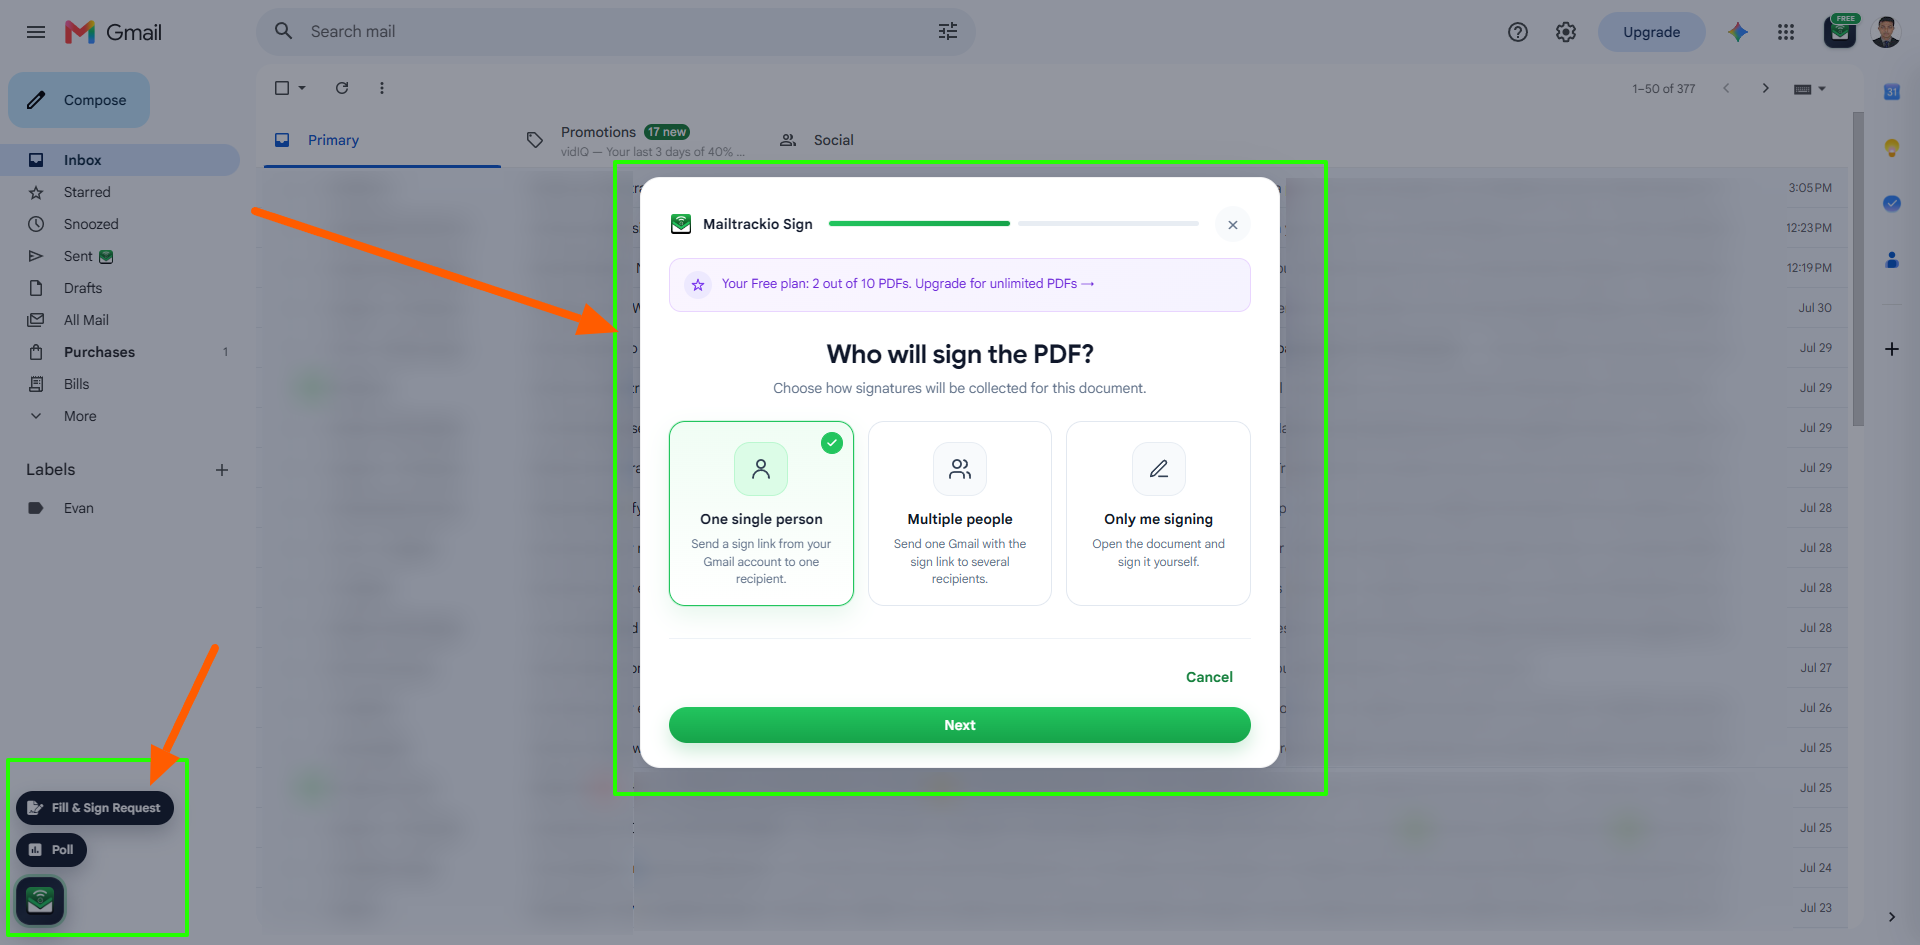
Step 1: Fill & sign request
Select the Mailtrakerio icon from the bottom left in Gmail, and click the Fill & sign request as your email campaign, or sign the PDF through email campaign:
- 5 PDFs — 5 email signature requests for the free plan.
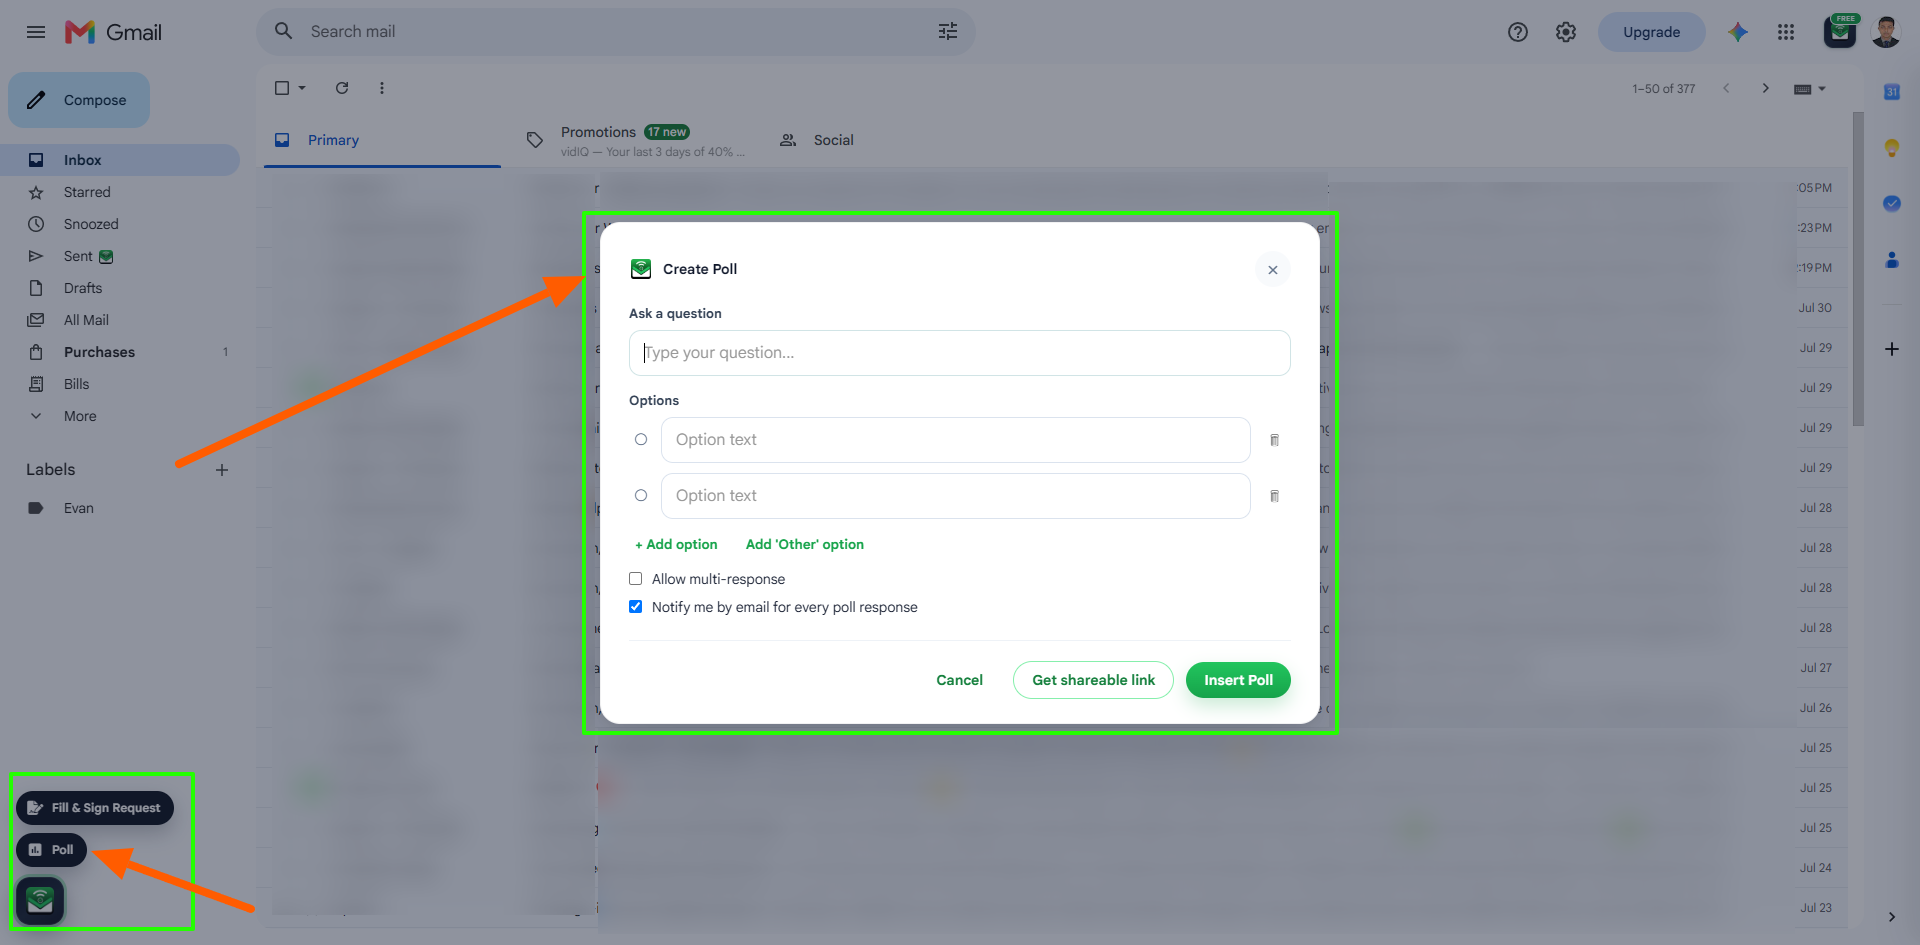
Step 2: Polls
Select the Mailtrakerio icon from the bottom left in Gmail, and click Polls as your email campaign, or create the Polls campaign name through email campaign:
- Unlimited Polls — Create unlimited polls through Gmail email requests for the free plan.
Using Mailtrakerio
Connect the extension and begin monitoring email activity.
Installing the Mailtrackio Chrome extension connects email tracking directly to Gmail. Here’s how to use it:
- Install — the extension from the Mailtrackio website dashboard.
- Create your account — verify your email and sign in through the extension.
- Open Gmail — Open Gmail and compose a new email as usual.
- Email Tracking — Enable email tracking before sending your message.
- Email Monitoring — Send the email to start monitoring opens, clicks, and recipient activity.
- Visit your Mailtrackio dashboard — To review tracking results, recent activity, polls, and fill-and-sign requests.
Why Email Tracking Matters
Keep important engagement data centralized and easier to review.
Because all your email activity is stored in one centralized dashboard, Mailtrackio saves you from manually checking replies or losing track of important recipient engagement. It is the natural place for:
- Tracked emails you want to monitor for opens and clicks.
- Recipient activity you need to review before following up.
- Poll responses you want to collect and manage.
- Fill-and-sign requests you need to track until completion.
- Recent email engagement data you want to access quickly from one place.
Final Notes
Review the complete Mailtrackio workflow and organization tips.
Thank you for taking the time to explore this documentation. Mailtrackio is designed to make professional email tracking easier for everyone, whether you're generating overall data for email tracking. Here are a few closing notes to help you get the most out of the platform.
A Quick Recap of Your Workflow
- Sign up and verify your email to activate your account.
- Check your Home dashboard to see your email tracking dashboard summary at a glance.
- Use the Home dashboard to review email opens, link clicks, recipient activity, and recent tracking data.
- Create polls or fill-and-sign requests when you need feedback, information, or document approval.
- Return to your dashboard anytime to manage tracked emails, review reports, and monitor engagement.
Keeping Your Mailtrackio Workspace Organized
As your email activity grows, a little organization can save you time:
- Use clear subject lines so tracked emails are easier to identify later.
- Review your dashboard regularly to keep track of email opens, clicks, polls, and fill-and-sign requests.
- Use search and filters to quickly find specific emails, recipients, or activity instead of scrolling through your full history.
- Keep important tracking reports and requests organized so you can follow up with recipients at the right time.
Troubleshooting Tips
Resolve common setup, verification, and tracking issues.
Need Further Assistance?
The Mailtrackio support team is available for additional help.
If you run into an issue that isn't covered in this documentation, our support team is here to help. You can contact us directly at support@mailtrackio.com, and we’ll be happy to assist you with any questions or technical concerns. We're continually updating this guide as new features roll out, so check back periodically for the latest tips and workflow updates.
Thanks for using Mailtrackio — we're excited to see what you create.